What Will I Learn?
- Setting up Socket.IO on server-side and client-side
- Using socket.io to make a chat system
Requirements
- No special requirements
- NodeJS installed on your system - Download Here
Difficulty
- Intermediate
Tutorial Contents
If you want to just get the code now, click here - HTML, here - Node.JS
In this tutorial, you will learn how to make chatting system with Socket.IO and Node.JS,
you will learn how to set up socket.io at server side and client side.
Curriculum
- Tutorial #1 - Setting Up Basic server
The Tutorial
first, we need to make "index.html" file and set up normal HTML file.
at the body put Input box Textarea and button (all with IDs to contact them with js)
and a Div with ID "chat"
(remove spaces)< input type="text" id="userName" placeholder="User name" />
< textarea id="chatBody" placeholder="Body..." style="width: 500px;" rows="6">
< button id="sendMessage">Send
< div id="chat">< /div>
then go to the end of the body and put this two scripts
(remove spaces)< script src="https://code.jquery.com/jquery-3.3.1.min.js">
< script src="/socket.io/socket.io.js">
now, let's install socket.io so we can work with it.
open command line at the project folder,
then use the command
npm install socket.io --save
it will take few seconds and then you will have socket.io at your project.
now let's get into the node.js file (Server.js for my) and setup the server.
first, we want to create a basic server (we call "handler" function to make it easier)
var app = require('http').createServer(handler);
then set up socket.io to our app variable,
var io = require('socket.io')(app);
then get fs(file system) to work with our index.html file,
var fs = require('fs');
then make a listen to the server (at port 80)
app.listen(80);
now we need to make the handler function so it will load the index.html and send the state of the page.
function handler (req, res) {
fs.readFile(__dirname + '/index.html',
function (err, data) {
if (err) {
res.writeHead(500);
return res.end('Error loading index.html');
}res.writeHead(200);
res.end(data);
});
}
now the server ready, it can work, but we need to setup IO(socket.io) connection.
so, it's really simple just do this:
io.on('connection', function(socket){ }
that's it.
so now after we done all of that we can start work,
first, let's go back to "index.html"
let's set up socket.io at the client side (HTML)
$(document).ready(function(){
var socket = io('http://localhost');
});
now we need to listen for the "send" button,
$("#sendMessage").click(function(){});
when we gonna click on the button it will give us anything at the "function(){}"
so let's save username&body at variables to make it easier
$name = $("#userName").val(), $body = $("#chatBody").val();
.val() giving us the value of the ID we took, for this time it's the input value.
now we need to emit this variables to the server-side.
socket.emit("sendMessage", {name: $name, body: $body});
full code version:
$("#sendMessage").click(function(){
$name = $("#userName").val();
$body = $("#chatBody").val();
socket.emit("sendMessage", {
name: $name,
body: $body
});
});
go back to the server file,
now we need to listen for the emit from the client-side.
any socket.io thing at the server side will be done at the
io.on('connection .............
so to listen for emits you need to use "socket.on" function, so let's listen for our emit
socket.on("sendMessage", function(data){});
data = the variables in JSON format.
so if I want to take "name" variable I will use "data.name" to get the variable.
so now we want to broadcast emit to everyone else that connecting to the socket.io and then we need to emit to the client-side who sent the emit.
broadcast emit work like that, it sends the emit for everyone except for the client-side who sent the emit so you need to emit as well for the sender.
socket.broadcast.emit("displayMessage", {name: data.name, chatBody: data.body});
socket.emit("displayMessage", {name: data.name, chatBody: data.body});
after that, we done with the server side.
get back to client-side and listen for "displayMessage" emit.
socket.on("displayMessage", function(data){$name = data.name, $body = data.chatBody;});
now let's make the message in a variable for a comfortable way to change it.
$message = "< div>< h4>"+$name+"</ h4>< br>< pre>"+$body+"</ pre>< /div>";
(remove spaces)
and now add the message to the client.
note: we use "prepend" to get the message to the top if you want it at the bottom use "append"
$("#chat").prepend($message);
full code version
socket.on("displayMessage", function(data){
$name = data.name, $body = data.chatBody;
$message = "< div>< h4>"+$name+"</ h4>< br>< pre>"+$body+"< /pre>< /div>";
$("#chat").prepend($message);
});
});
(remove spaces)
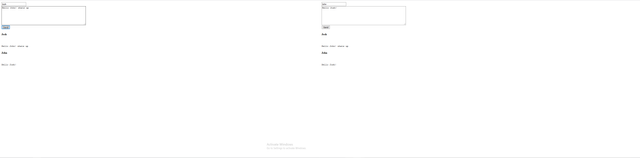
now we done and we can start chatting.
examples: (screenshot from 2 monitors)
Posted on Utopian.io - Rewarding Open Source Contributors
Release the Kraken! You got a 12.12% upvote from @seakraken courtesy of @lonelywolf!
Downvoting a post can decrease pending rewards and make it less visible. Common reasons:
Submit
Congratulations! This post has been upvoted from the communal account, @minnowsupport, by TheLonelyWolF🐺 from the Minnow Support Project. It's a witness project run by aggroed, ausbitbank, teamsteem, theprophet0, someguy123, neoxian, followbtcnews, and netuoso. The goal is to help Steemit grow by supporting Minnows. Please find us at the Peace, Abundance, and Liberty Network (PALnet) Discord Channel. It's a completely public and open space to all members of the Steemit community who voluntarily choose to be there.
If you would like to delegate to the Minnow Support Project you can do so by clicking on the following links: 50SP, 100SP, 250SP, 500SP, 1000SP, 5000SP.
Be sure to leave at least 50SP undelegated on your account.
Downvoting a post can decrease pending rewards and make it less visible. Common reasons:
Submit
Thank you for your contribution, yet it cannot be approved because it does not follow the Utopian Rules.
While I appreciate the work you did, yet you are presenting a tutorial without explaining many of the essential steps needed to implement this.
The simplest example is when adding jQuery, you do not highlight "why" we need to add jQuery, or what does it do.
You do not explain the ideas behind having those specific fields at the interface. The more information you provide the more professional your tutorial would be.
Your code formatting at the interface is not well presented. You could have easily used newlines to make the code more readable.
You can contact us on Discord.
[utopian-moderator]
Downvoting a post can decrease pending rewards and make it less visible. Common reasons:
Submit